Simple Homemade French Bread in a Dutch Oven
This Easy French Bread recipe delivers a golden-brown, crisp outer crust with a soft, airy inside, baked to perfection in a Dutch oven…
- Prep
- 1 hr 35 mins
- Cook
- 30 mins
- Cook Time (with lid off)
- 15 mins
- Total
- 2 hrs 20 mins
- Makes
- 8 servings
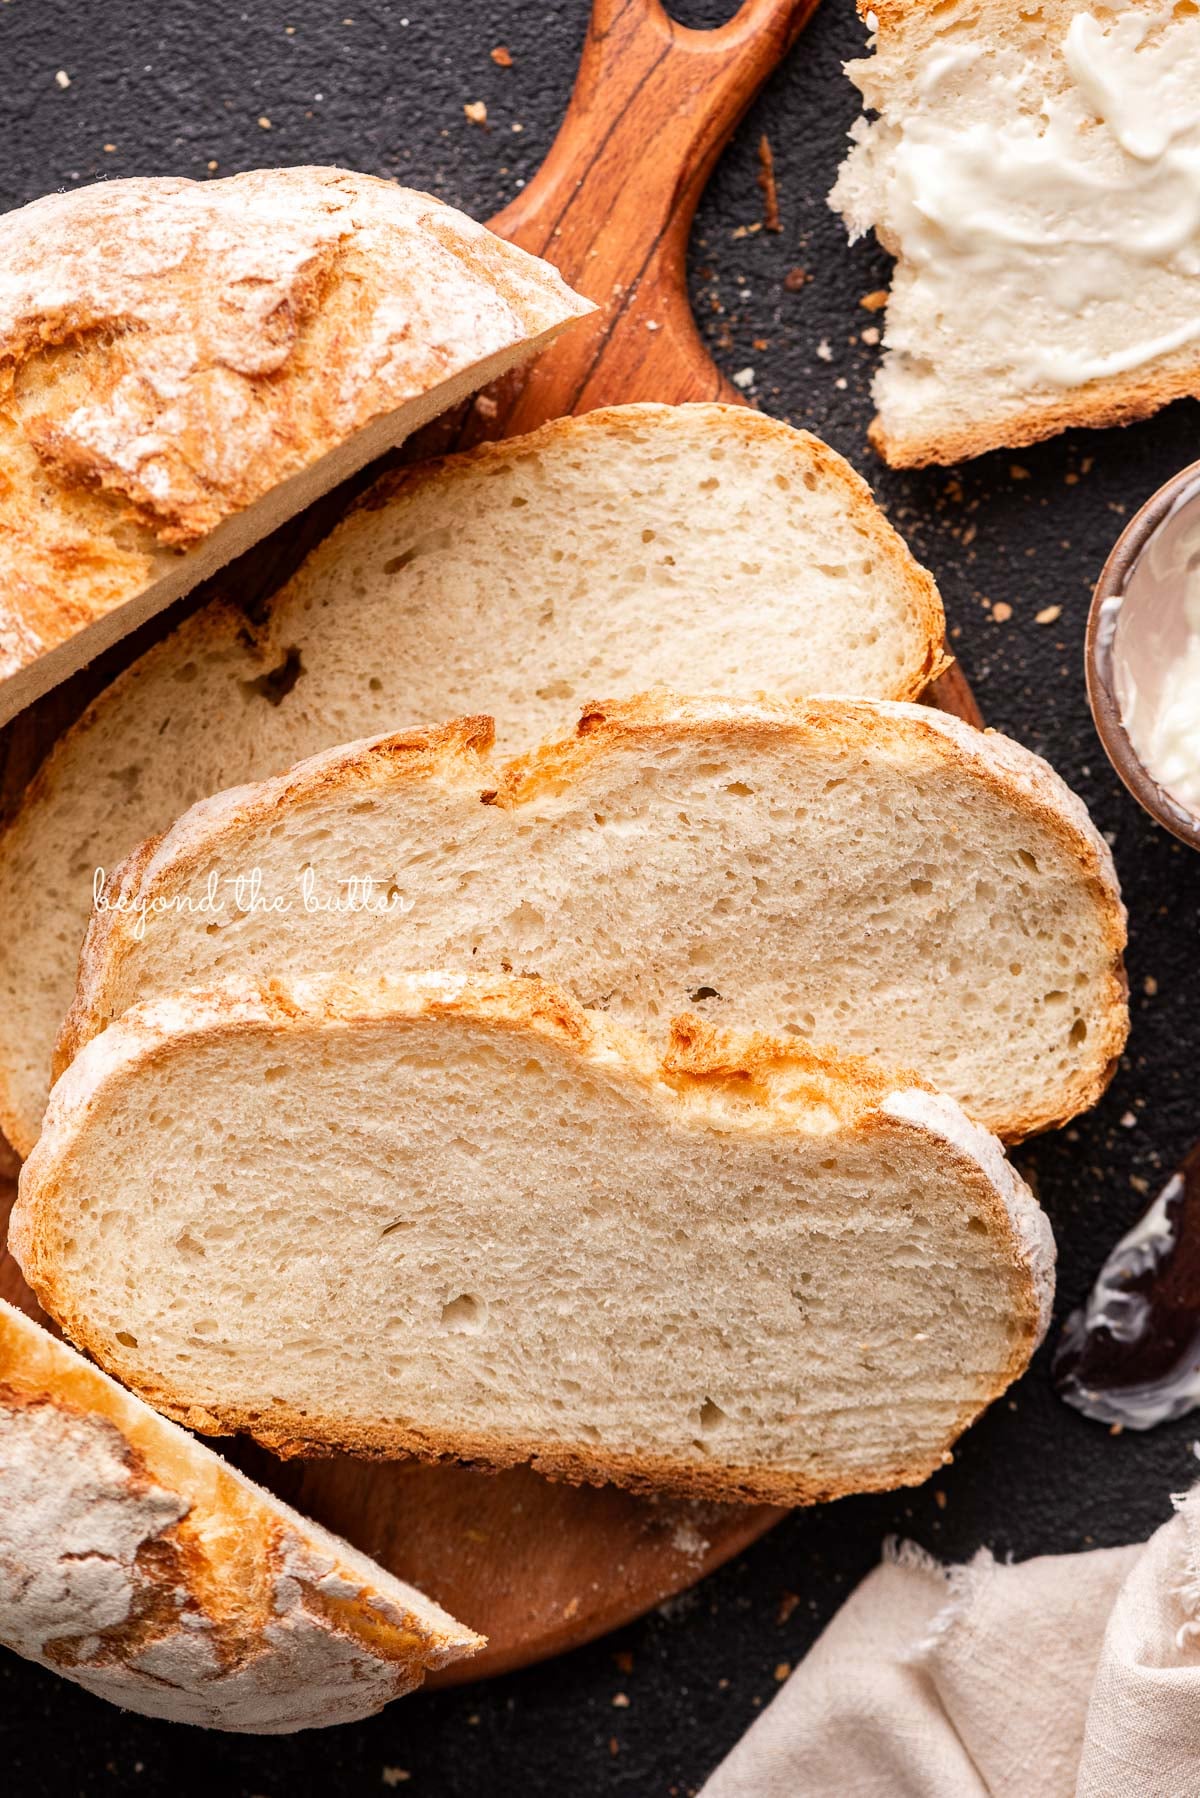
This Easy French Bread recipe gives you a golden-brown, crispy crust and a soft, airy center, baked to perfection in a Dutch oven. It's very simple to make, incredibly tasty, and goes wonderfully with your favorite butter, dipping oil, sandwich fillings, and more!
I absolutely love bread, and with World Bread Day coming up, I thought it would be fun to share a really simple French bread recipe. Like my Honey Butter Dinner Rolls, Easy Homemade Bagels, and Homemade Soft Pretzels, it is made from simple pantry ingredients you probably already have in your kitchen!
It's easy to prepare thanks to my Ankarsrum Assistent Original Mixer, its baking accessories, and bowl cover. It has two rises (one hour for the first and 30 minutes for the second), takes a few minutes of shaping, and bakes in a preheated Dutch oven.
This classic French bread smells and tastes wonderful, lifts any meal, or holds its own on the table.
What You'll Need
The ingredients in the image below go into this easy french bread recipe. The bulleted items need a bit more explanation.
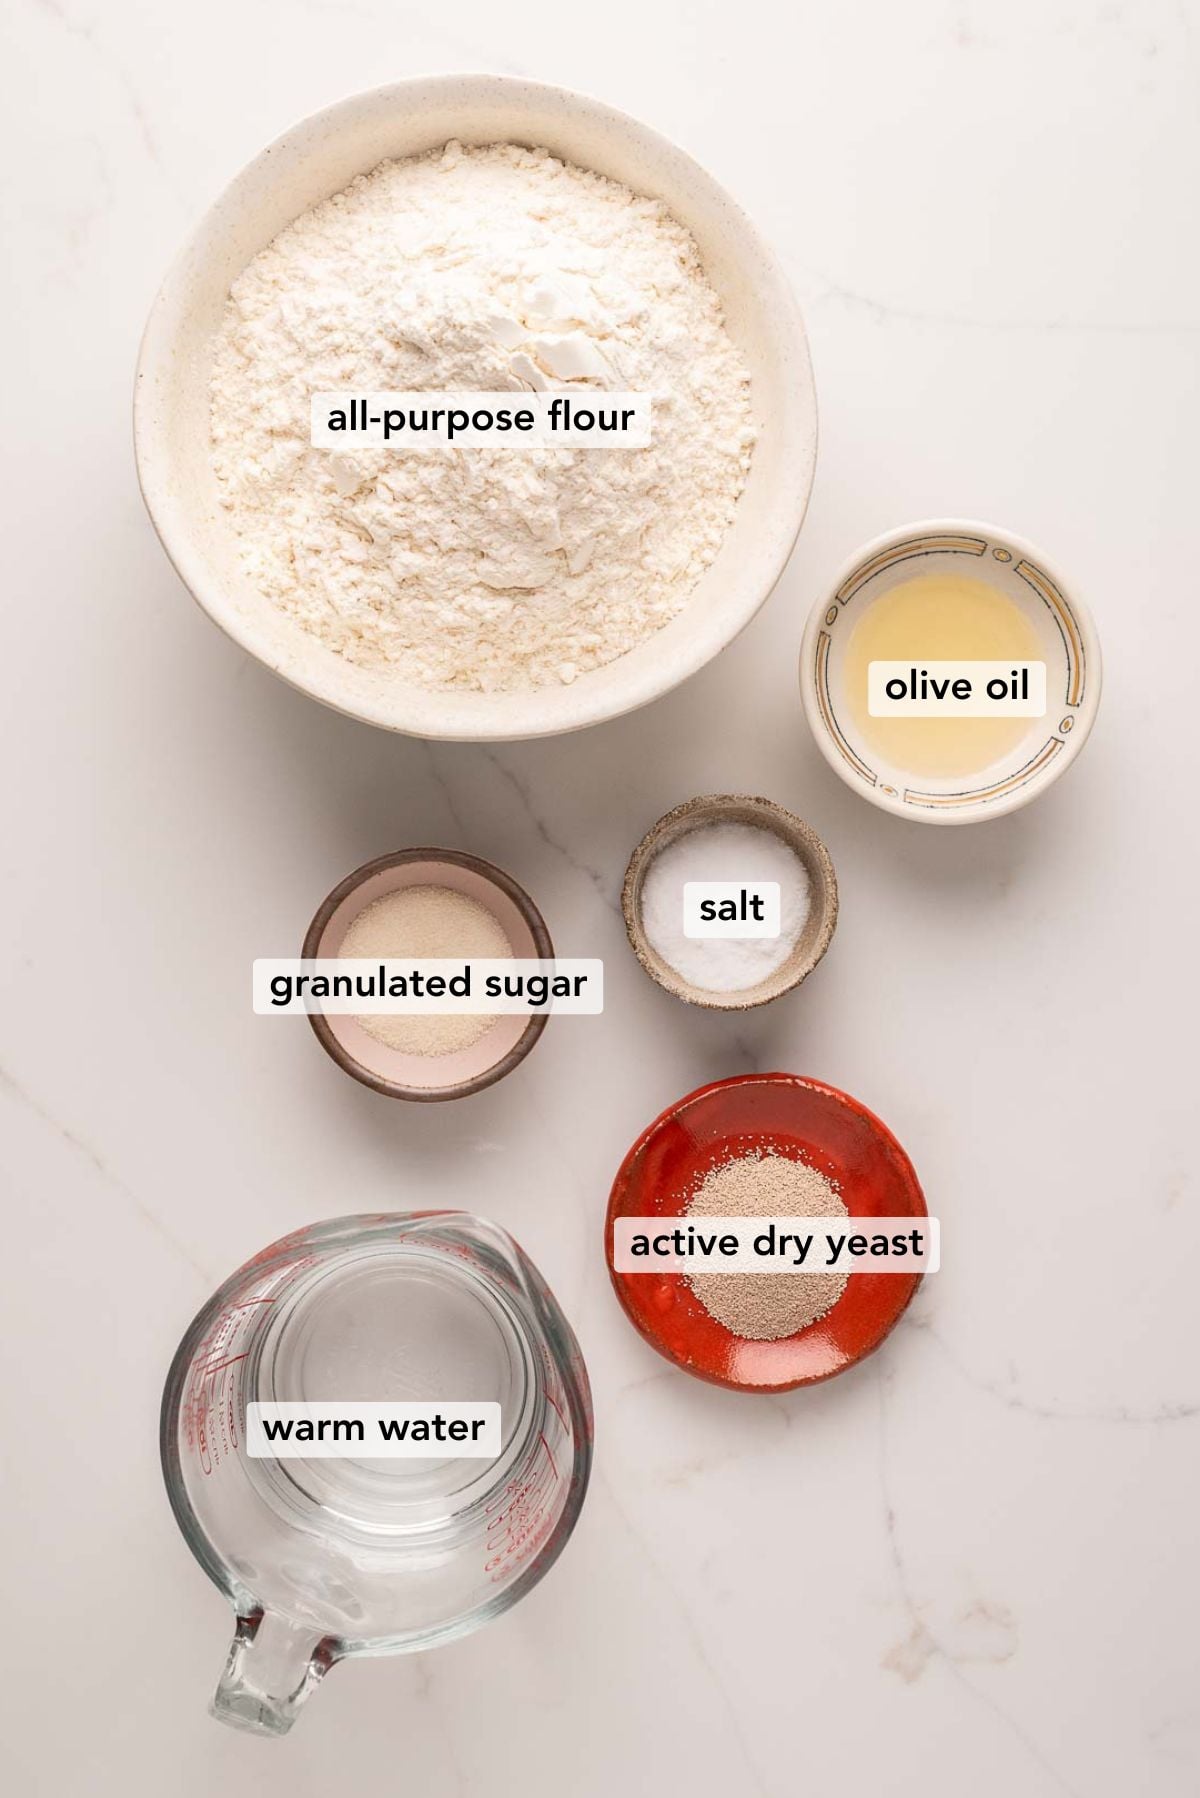
- All Purpose Flour. I used King Arthur all purpose flour, but feel free to use what you have. Bread flour works as a 1:1 swap.
- Active Dry Yeast. A jar of yeast or a single packet works. A packet holds about 2 1/4 teaspoons, the same amount this recipe needs. Instant yeast can also stand in for active dry, though the rises will be a little shorter.
- Warm Water. Warm means warm to the touch, not cool or hot. If you're using a digital thermometer, aim for 80ºF-110ºF.
- Granulated Sugar. Honey works as a 1:1 substitute for granulated sugar.
Measurements and step-by-step directions are in the recipe card below.
Directions
Here's a quick overview of how to make this easy french bread. The recipe card below has the full printable version, in US customary or metric measurements.
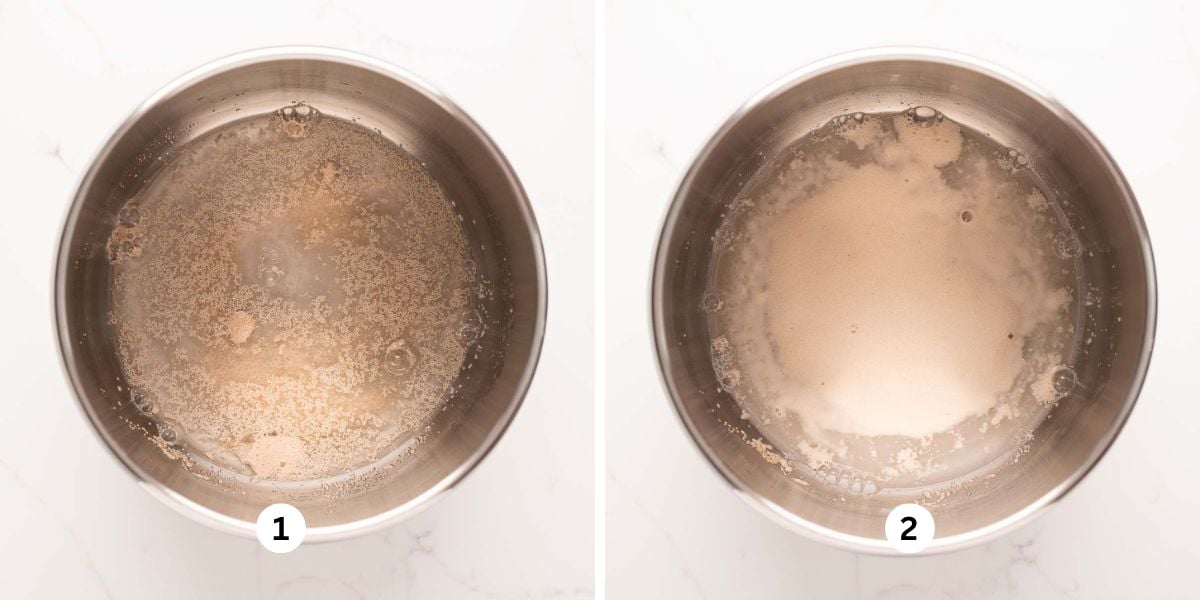
Step 1. Proof the yeast mixture. Add the yeast, sugar, and warm water to your Ankarsrum mixer bowl, or a mixing bowl if you're mixing by hand (Image 1). Give it a quick whisk, then cover with the mixing bowl cover (or a clean tea towel). Let it sit for 5 minutes to proof. When it's ready, the top should look foamy (Image 2).
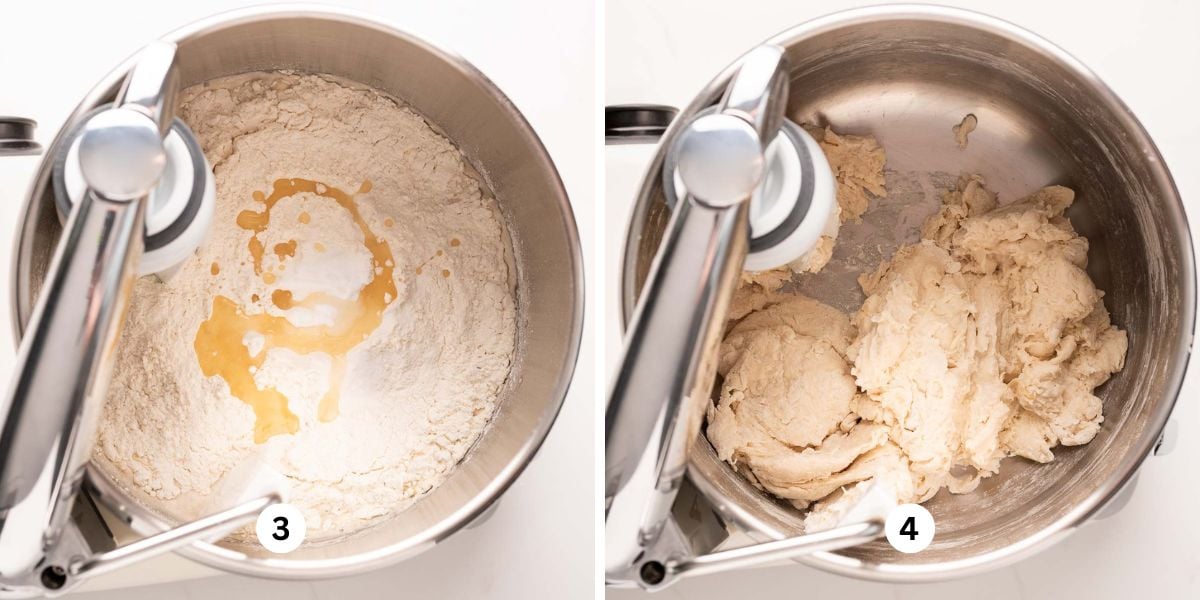
Step 2. Add the remaining ingredients. Stir in the all-purpose flour, olive oil, and salt (Image 3). Mix on medium speed with your dough roller and dough knife attachments (or a dough whisk if mixing by hand) until the flour is fully worked in (Image 4). The dough will be a bit wet and sticky and look shaggy.
Quick Tip: If the dough is still quite wet and very sticky after using 3 cups of flour, add 1/4 cup (36g) of all-purpose flour. You can add another 1/4 cup if needed, but I wouldn't go past that. The dough is meant to be a little wet and sticky. During my testing, I ended up using 3 1/4 cups.
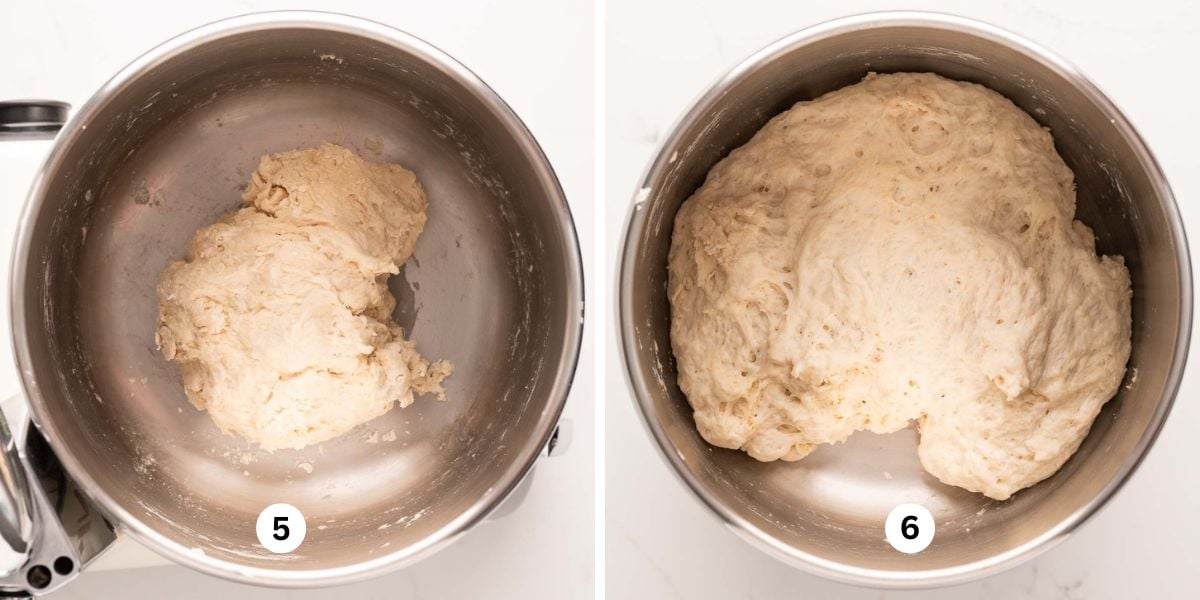
Step 3. Cover and let the dough rise. Leave the dough in the mixing bowl and cover it with either the Ankarsrum bowl cover or a clean tea towel. Set it in a warm spot in your kitchen and let it rise for 1 hour, until doubled in size (Images 5 and 6). Don't punch the dough down. Instead, turn the bowl over so the dough falls onto a clean, lightly floured surface. Use your spatula attachment or a regular spatula to scrape up any dough stuck to the bottom of the bowl.
Quick Tip: You can dust the inside of the stainless steel mixing bowl with a little flour to keep the dough from sticking later, though it isn't necessary.
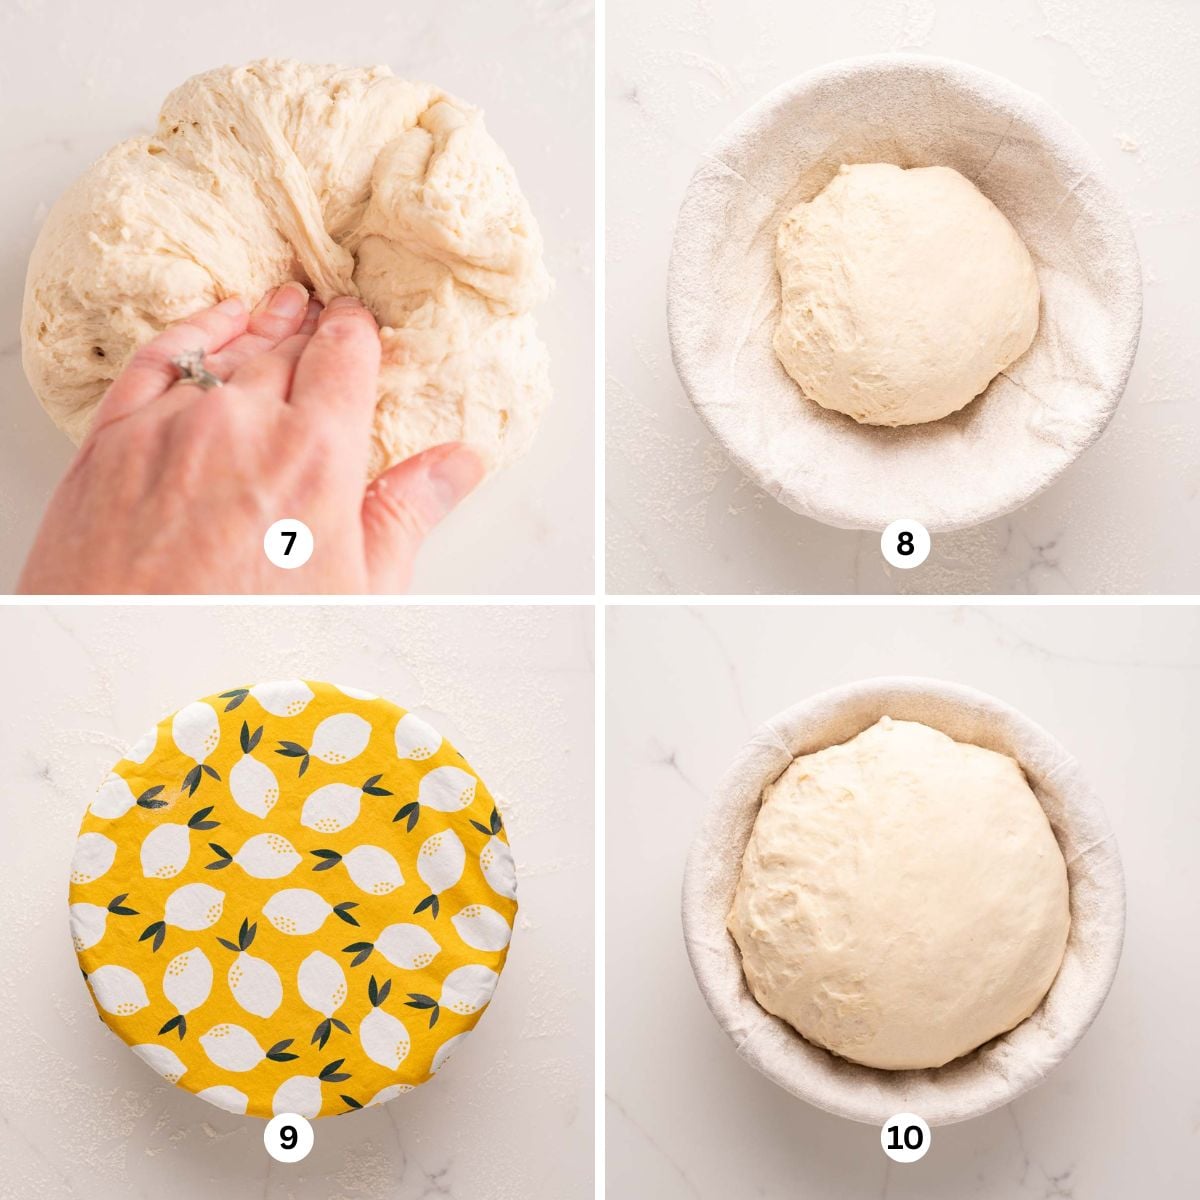
Step 4. Shape the dough and let it rise again. Gently shape it by lifting one corner and folding it into the center. Repeat several times, until the dough no longer wants to stretch (Image 7). Place the dough seam side down into a well-floured banneton bread proofing basket (or a mixing bowl), so the smooth top is showing (Image 8). Cover with a fabric bread cover or a clean tea towel and let it rise another 30 minutes, until doubled in size (Images 9 and 10).
Quick Tip: While the dough is on its second rise, preheat your oven to 425ºF with the Dutch oven (lid on) on the center rack. I also strongly suggest preheating a sheet pan or cookie sheet directly beneath the Dutch oven to keep the bottom of your loaf from burning.
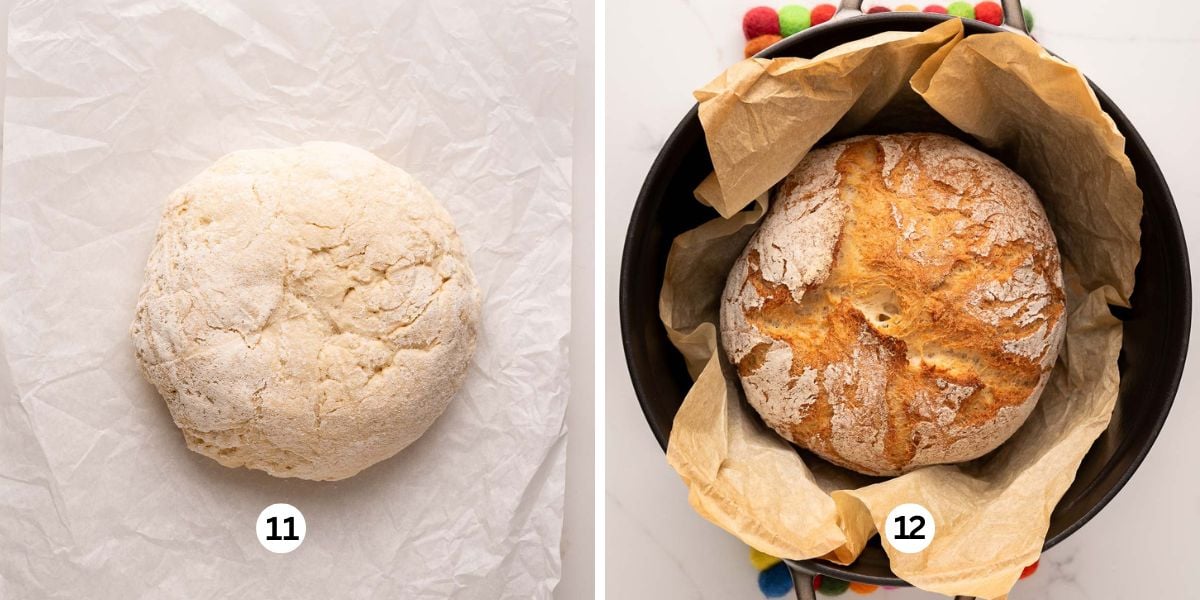
Step 5. Turn the dough onto parchment and bake. Once the dough has doubled, flip it onto the center of a crumpled sheet of parchment, seam side up. This gives you that beautifully cracked top (Image 11). Carefully lower the bread on its parchment sling into the preheated Dutch oven. Put the lid back on and bake for 30 minutes at 425ºF. At that point, the bread should be a light golden brown. After 30 minutes, take the lid off and bake for another 15 minutes (Image 12).
Quick Tip: If you skip the baking sheet under your Dutch oven, reduce the second bake time (lid off) to 10 minutes.
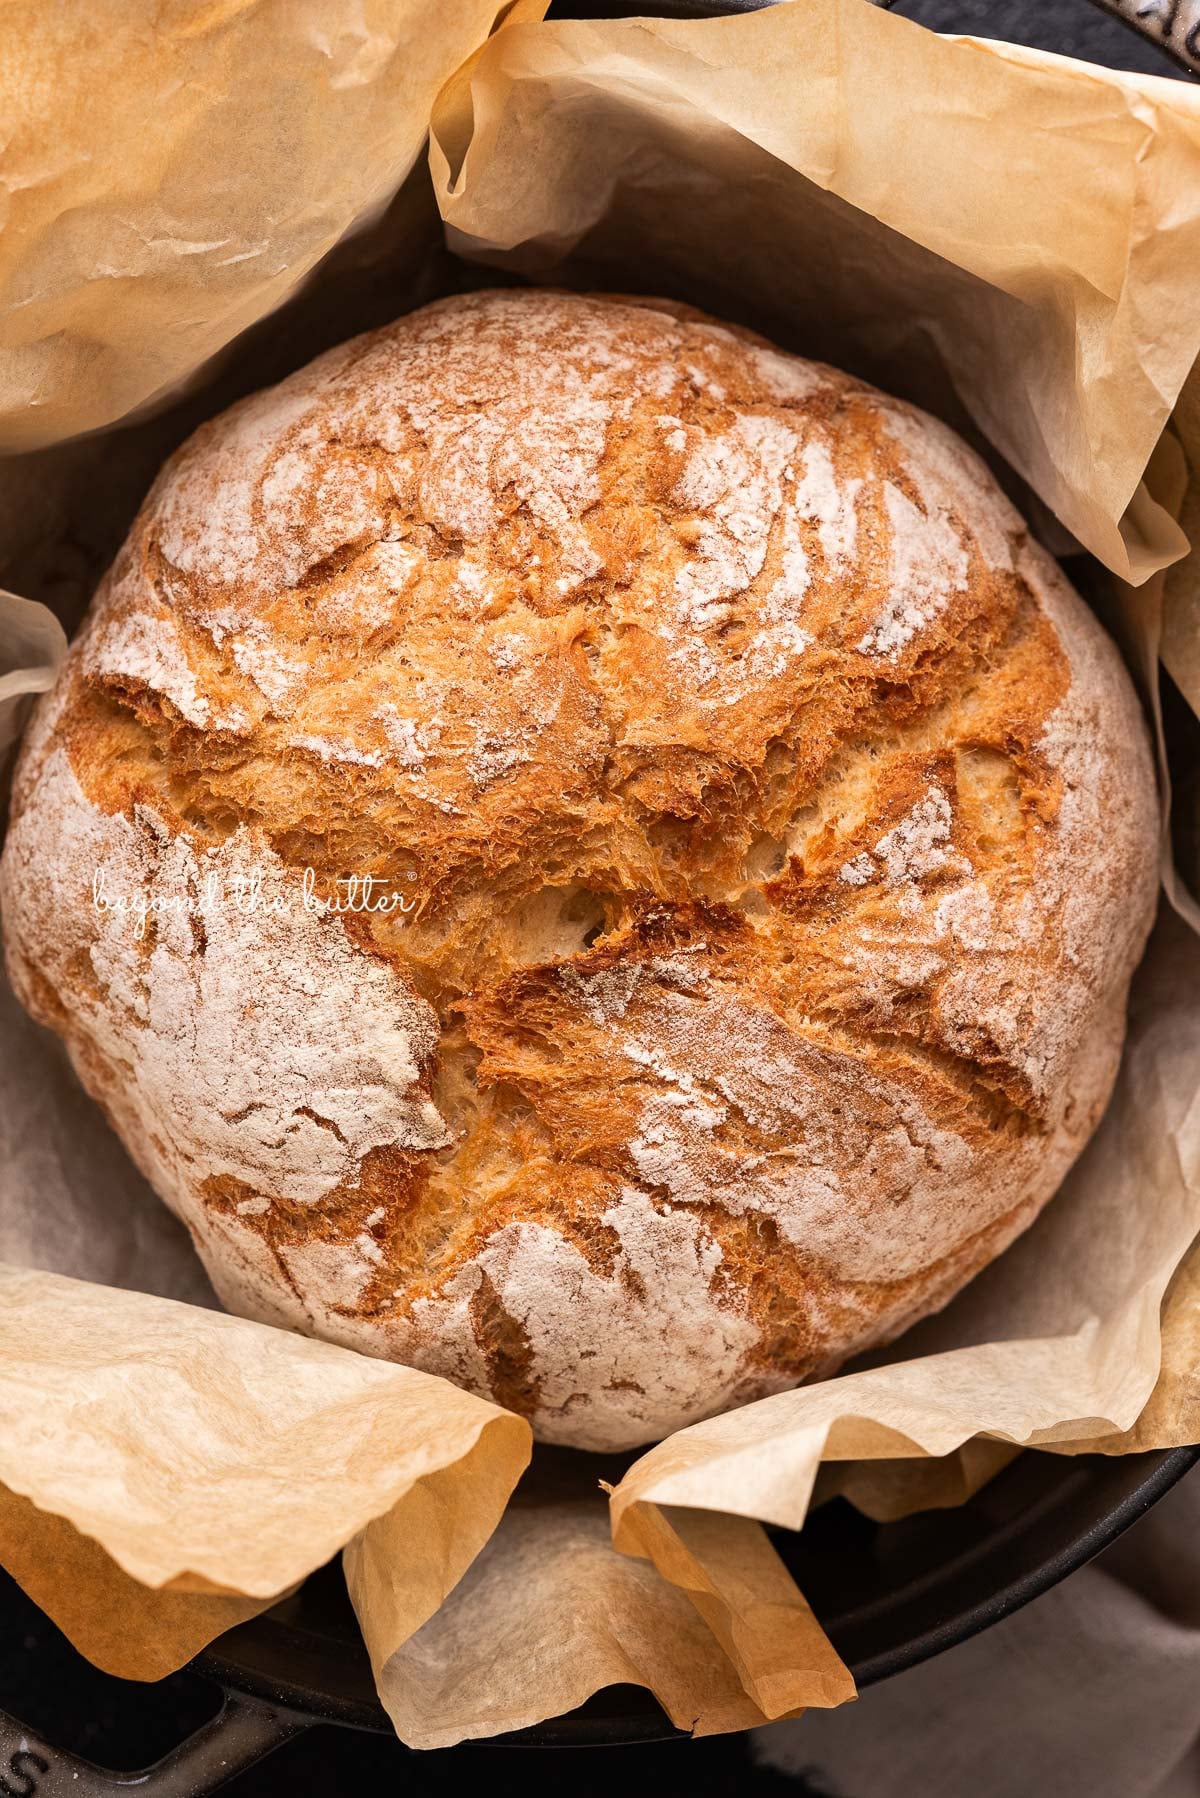
Step 6. Remove the bread and let it cool. The parchment sling becomes a bit brittle, so handle it gently. Use tongs or oven mitts to grab the parchment and move the bread onto a cooling rack. Slide the parchment out from under the loaf and toss it. Let the bread cool for 1-2 hours to room temperature. You may hear it crackle for a few minutes once it's on the rack, which is a good sign!
It's tempting to slice it right away, but it's best to wait until the loaf has cooled completely to room temperature.
Storage
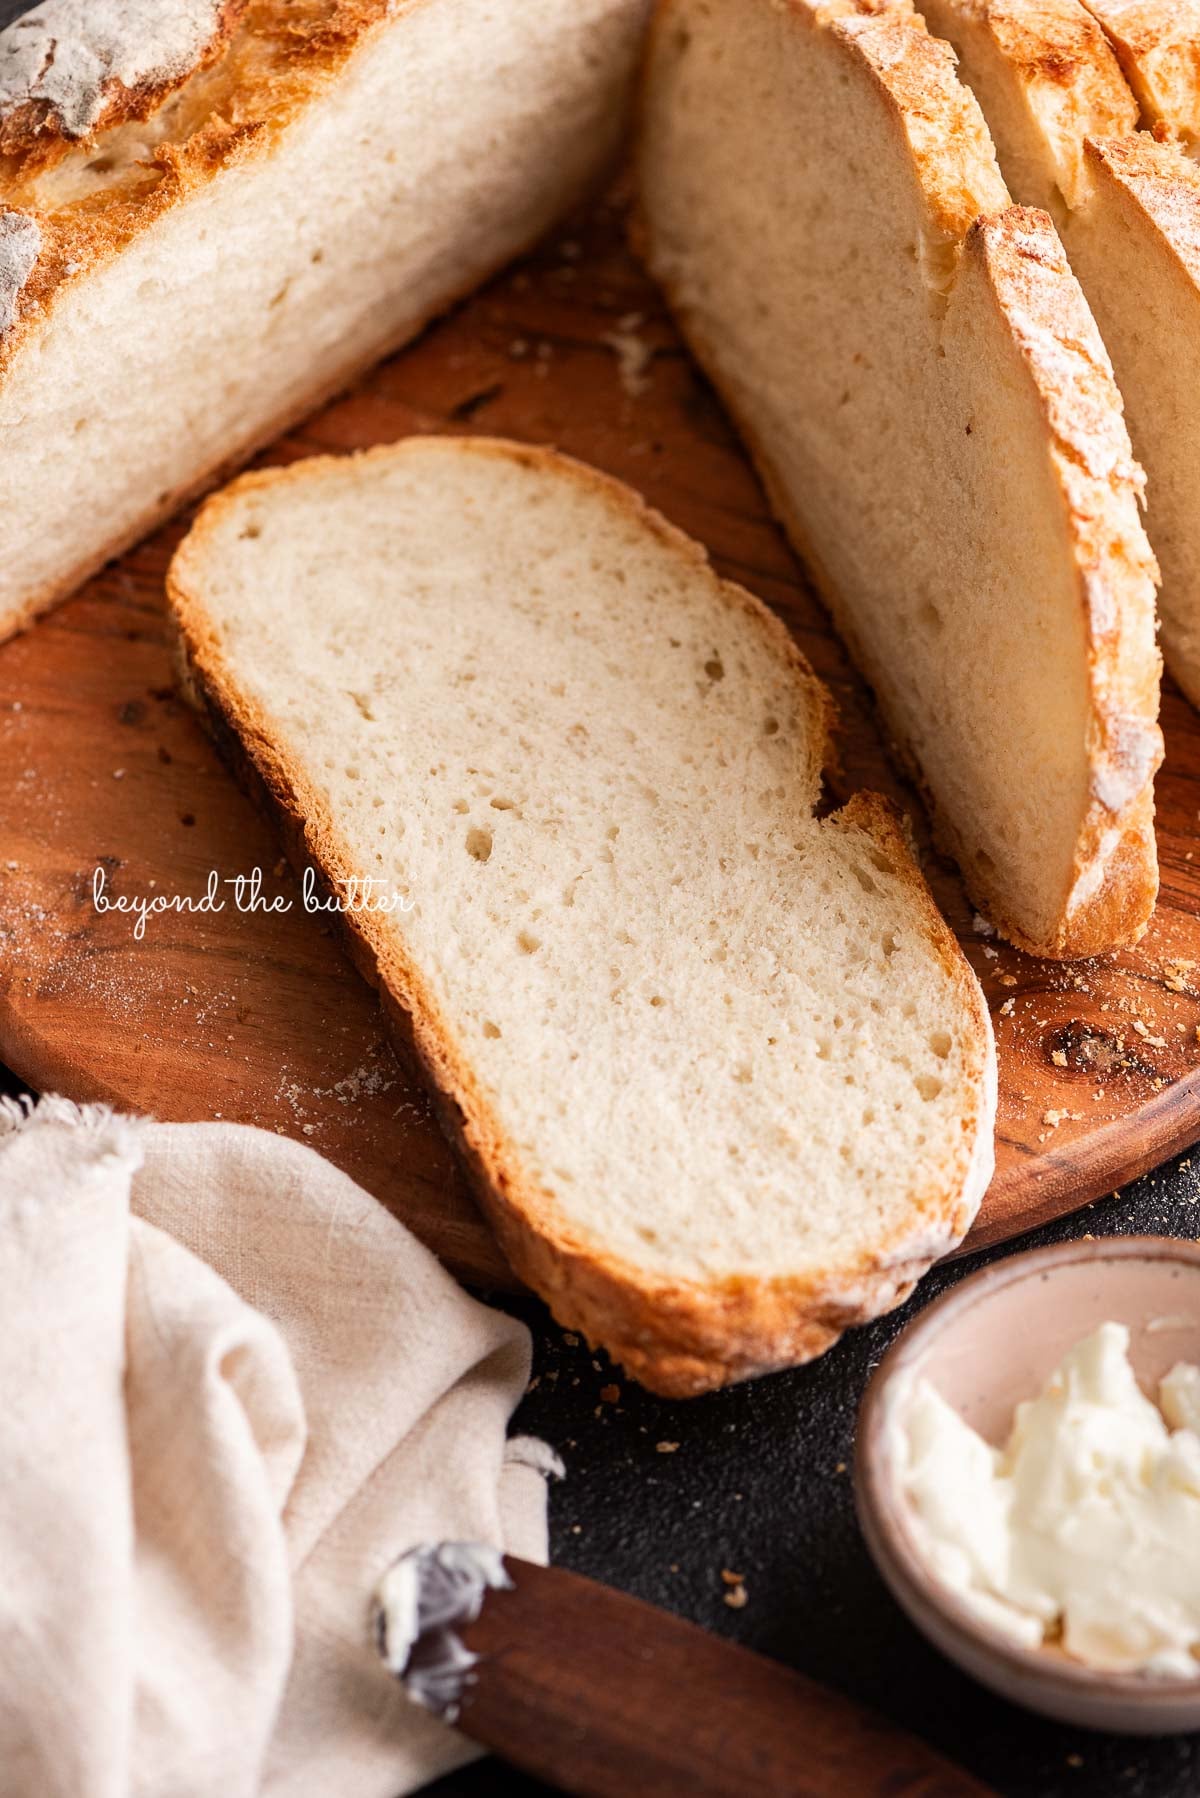
- Store your bread at room temperature in a paper or plastic bag for 3-4 days. If you use a plastic bag, squeeze out as much air as you can before sealing it.
- If you keep sliced bread in a paper bag, store it cut side down. That helps keep the open side soft.
- Unless you live in a humid climate, skip the fridge, since it makes bread go stale faster. Freeze it instead. Slice the bread, wrap it in plastic wrap, and seal it in a freezer bag. When you want a slice or two, let it thaw at room temperature, then toast or warm it. Frozen bread keeps for up to 3 months.
Common Questions
Can I use instant yeast instead of active dry yeast?Yes. Your rises will be a little shorter.
Can I use bread flour instead of all-purpose flour to make this french bread?Yes. It's a 1:1 swap.
What size dutch oven should I use?I suggest a 5-6 quart Dutch oven. Mine is a 5.5-quart size from Staub.
Can you freeze french bread?Yes, but slice it first (once cooled) before wrapping it in plastic and storing it in a freezer bag. That way you can grab individual slices when you need them. Frozen bread keeps for up to 3 months.
More Recipes You'll Enjoy
Looking for more recipes made with the Ankarsrum Assistent Original Mixer? Try these:
If you made this Easy French Bread Recipe or any other recipe on my website, please leave a star rating and tell me what you thought in the comments below. Thanks for stopping by!
Simple Homemade French Bread in a Dutch Oven
This recipe gives you a golden, crackly crust and a soft, airy crumb, baked in a Dutch oven. It's very simple to make, full of flavor, and pairs well with butter, dipping oil, sandwich fillings, and much more!
- Prep
- 1 hr 35 mins
- Cook
- 30 mins
- Cook Time (with lid off)
- 15 mins
- Total
- 2 hrs 20 mins
- Makes
- 8 servings
Ingredients
- 2 1/4 tsp Active Dry Yeast
- 1 tbsp Granulated Sugar
- 1 1/4 cup Warm Water
- 1 1/2 tsp Salt
- 1 tbsp Olive Oil
- 3-3 1/2 cups All-Purpose Flour
Method
- Add the active dry yeast, granulated sugar, and warm water (between 80ºF-110ºF) to your Ankarsrum mixer bowl, or a separate bowl if you're not using a mixer. Whisk briefly, then cover with the bowl cover (or a clean tea towel). Let it sit for 5 minutes. The top should look foamy.
- Add 3 cups of all-purpose flour, olive oil, and salt. Mix on medium speed with the dough roller and dough knife attachments (or a dough whisk by hand) until the flour is fully incorporated. The dough will be slightly sticky and look shaggy. If it still feels quite wet and sticky, add 1/4 cup (36g) of all-purpose flour. You can add another 1/4 cup if needed, but avoid going past that.
- Leave the dough in the bowl, cover it with the bowl cover or a clean tea towel, and set it in a warm spot to rise for 1 hour, until doubled. Do NOT punch it down.
- Generously flour a round 9-inch banneton proofing basket (or a mixing bowl). Set aside.
- Once doubled, turn the dough out onto a clean, lightly floured surface (a counter, wooden board, etc.). If any dough is stuck to the bottom of the bowl, scrape it off with a spatula and add it to the dough. Gently shape the dough by lifting a corner and folding it into the center. Repeat until the dough no longer wants to stretch.
- Place the shaped dough seam side down in the floured banneton (smooth side up), then cover with a fabric bread cover or a clean tea towel. Let it rise another 30 minutes, until doubled in size.
- While the bread rises the second time, set an oven rack in the center position. Place a sheet pan or cookie sheet on the rack, then set the Dutch oven (lid on) on top of it (see the notes on why I use a baking sheet). Preheat the oven, with the Dutch oven and baking sheet inside, to 425ºF.
- When the bread is ready, flip it onto a crumpled sheet of parchment, seam side up. Carefully lower the bread on its parchment sling into the preheated Dutch oven. Put the lid back on and bake for 30 minutes at 425ºF. The bread should be light golden brown at this point. After 30 minutes, remove the lid and bake for another 15 minutes.
- When done, take the Dutch oven out of the oven and lift the bread out using the parchment sling. The parchment will be a bit brittle, so handle it gently. Use tongs or oven mitts to grab the parchment and move the bread to a cooling rack. Slide the parchment out from under the loaf and discard it. Cooling takes 1-2 hours. It's tempting to slice it right away, but wait, since the bread keeps cooking as it cools.
- Once fully cool, slice the bread and serve it right away, or put it in a plastic zip-top bag and keep it at room temperature for up to 3 days. You can also wrap the slices in plastic wrap and store them in a freezer bag in the freezer for up to 3 months.
Baker’s notes
- Prep time covers proofing the yeast and the rise times. I strongly recommend preheating a sheet pan or cookie sheet placed right under the Dutch oven so the loaf's bottom doesn't burn, since it absorbs heat that would otherwise hit the bottom of the pot. If you skip the baking sheet, reduce the second bake time (lid off) to 10 minutes. Crumpling the parchment is my personal preference and isn't required. I simply find it easier to place in the Dutch oven along with the bread.