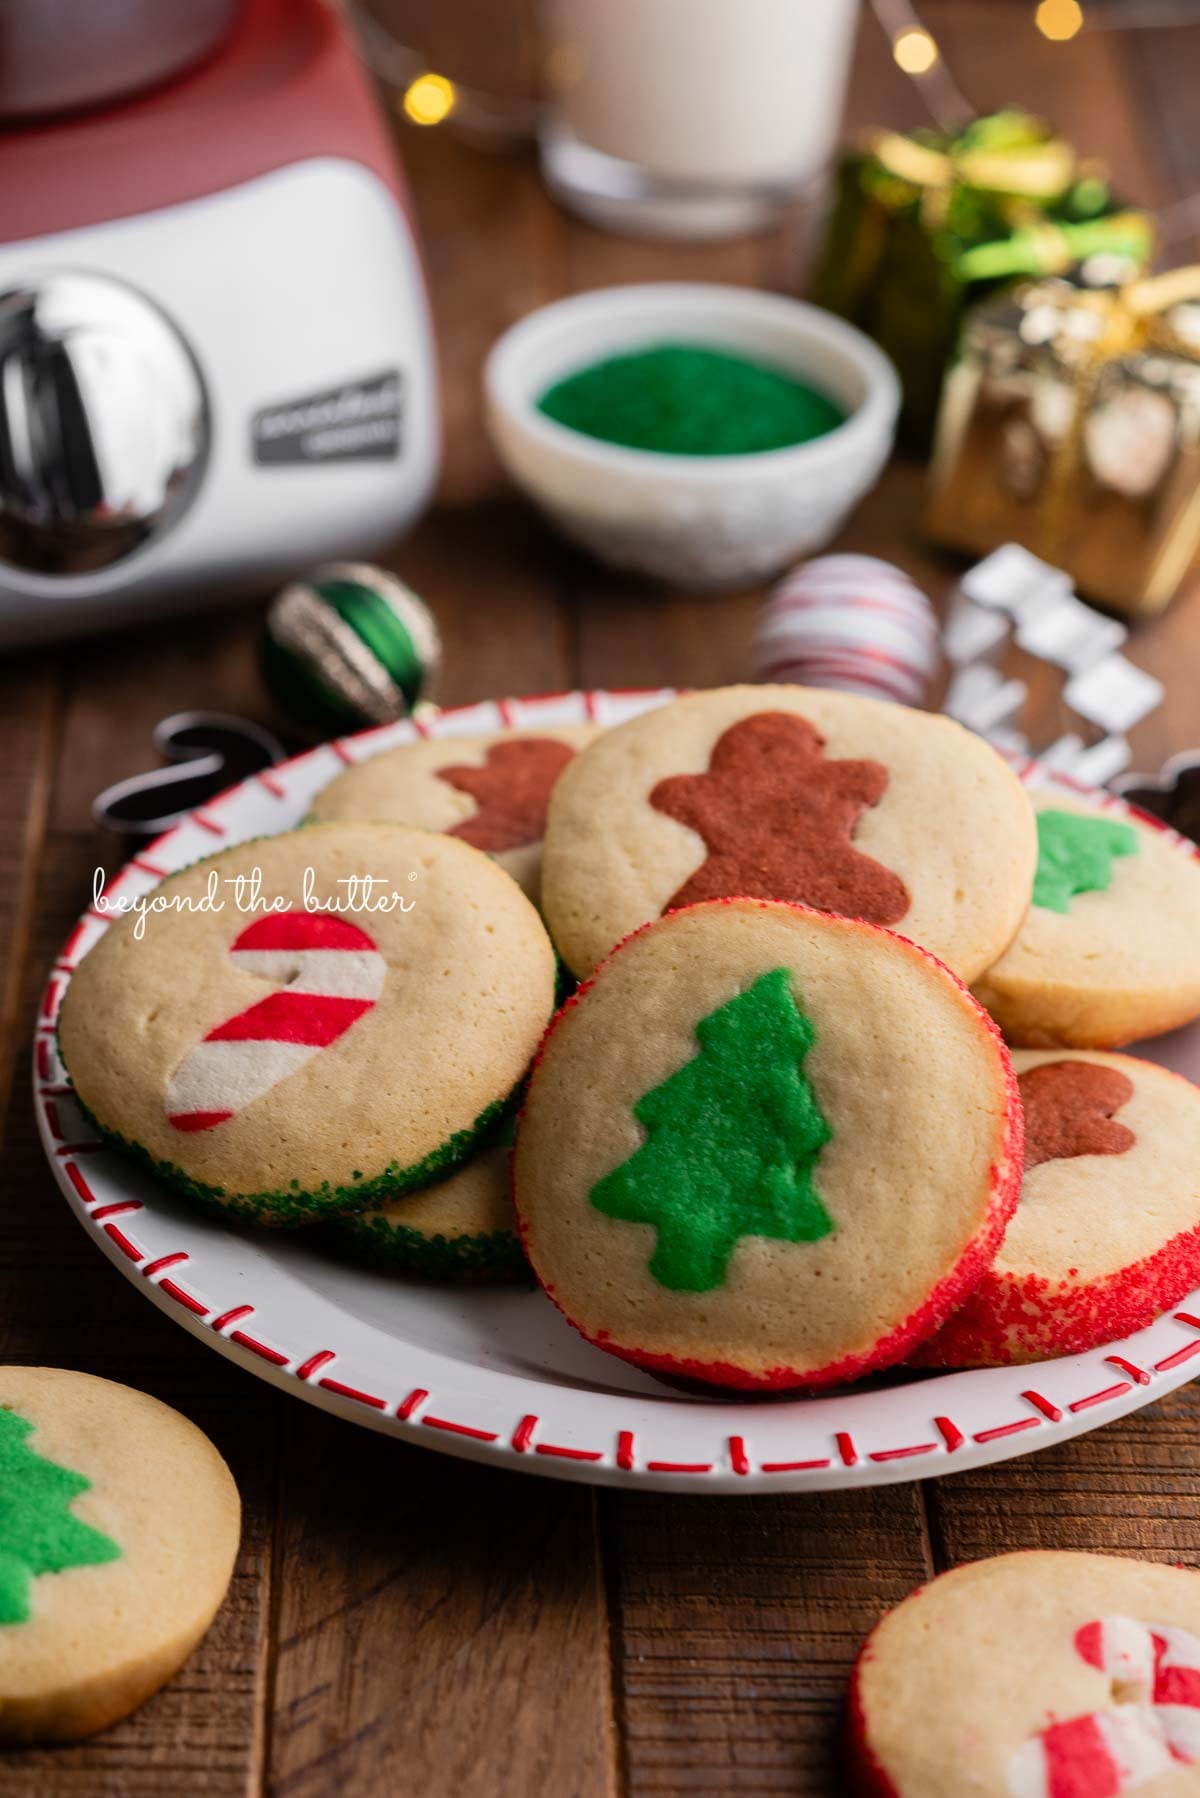
Festive Slice and Bake Cookies for the Holidays
These festive slice and bake cookies are a fun, tasty way to enjoy something homemade during the holidays.
- Prep
- 45 mins
- Cook
- 8 mins
- Chill Time
- 2 hrs 30 mins
- Total
- 3 hrs 23 mins
- Makes
- 16 cookies

These Holiday Slice and Bake Cookies make a fun, tasty homemade treat for the holidays. Since the dough is made ahead, you can slice, bake, and serve warm cookies in minutes, whether you're sharing them or giving them away. They're ideal for busy seasons when you want something sweet without spending long in the kitchen!
This recipe is a copycat of the Pillsbury version, but even better because it is homemade, and you can make these for almost any holiday, not just the big ones! I was also inspired by my Super Soft Cut Out Sugar Cookies, a family favorite. For a chocolate option, check out my Chocolate Cut Out Sugar Cookies!
You'll love this recipe for its buttery flavor, its soft, tender texture, and how simple they are to make, thanks to my Ankarsrum Assistent Original Mixer, its cookie beater whisks, and the stainless steel beater bowl that's sturdy, heat resistant, and easy to clean!
For extra sparkle, roll each cookie dough log in festive green and red sparkling sugars! They taste fantastic and stand out on any holiday cookie spread.
For more recipes made with my Ankarsrum mixer and its attachments, try my Easy French Bread, Lemon Cheesecake, Mini Chocolate Banana Blender Muffins, Chocolate Brownie Ice Cream, and Carrot Cake Cookies!
What You'll Need
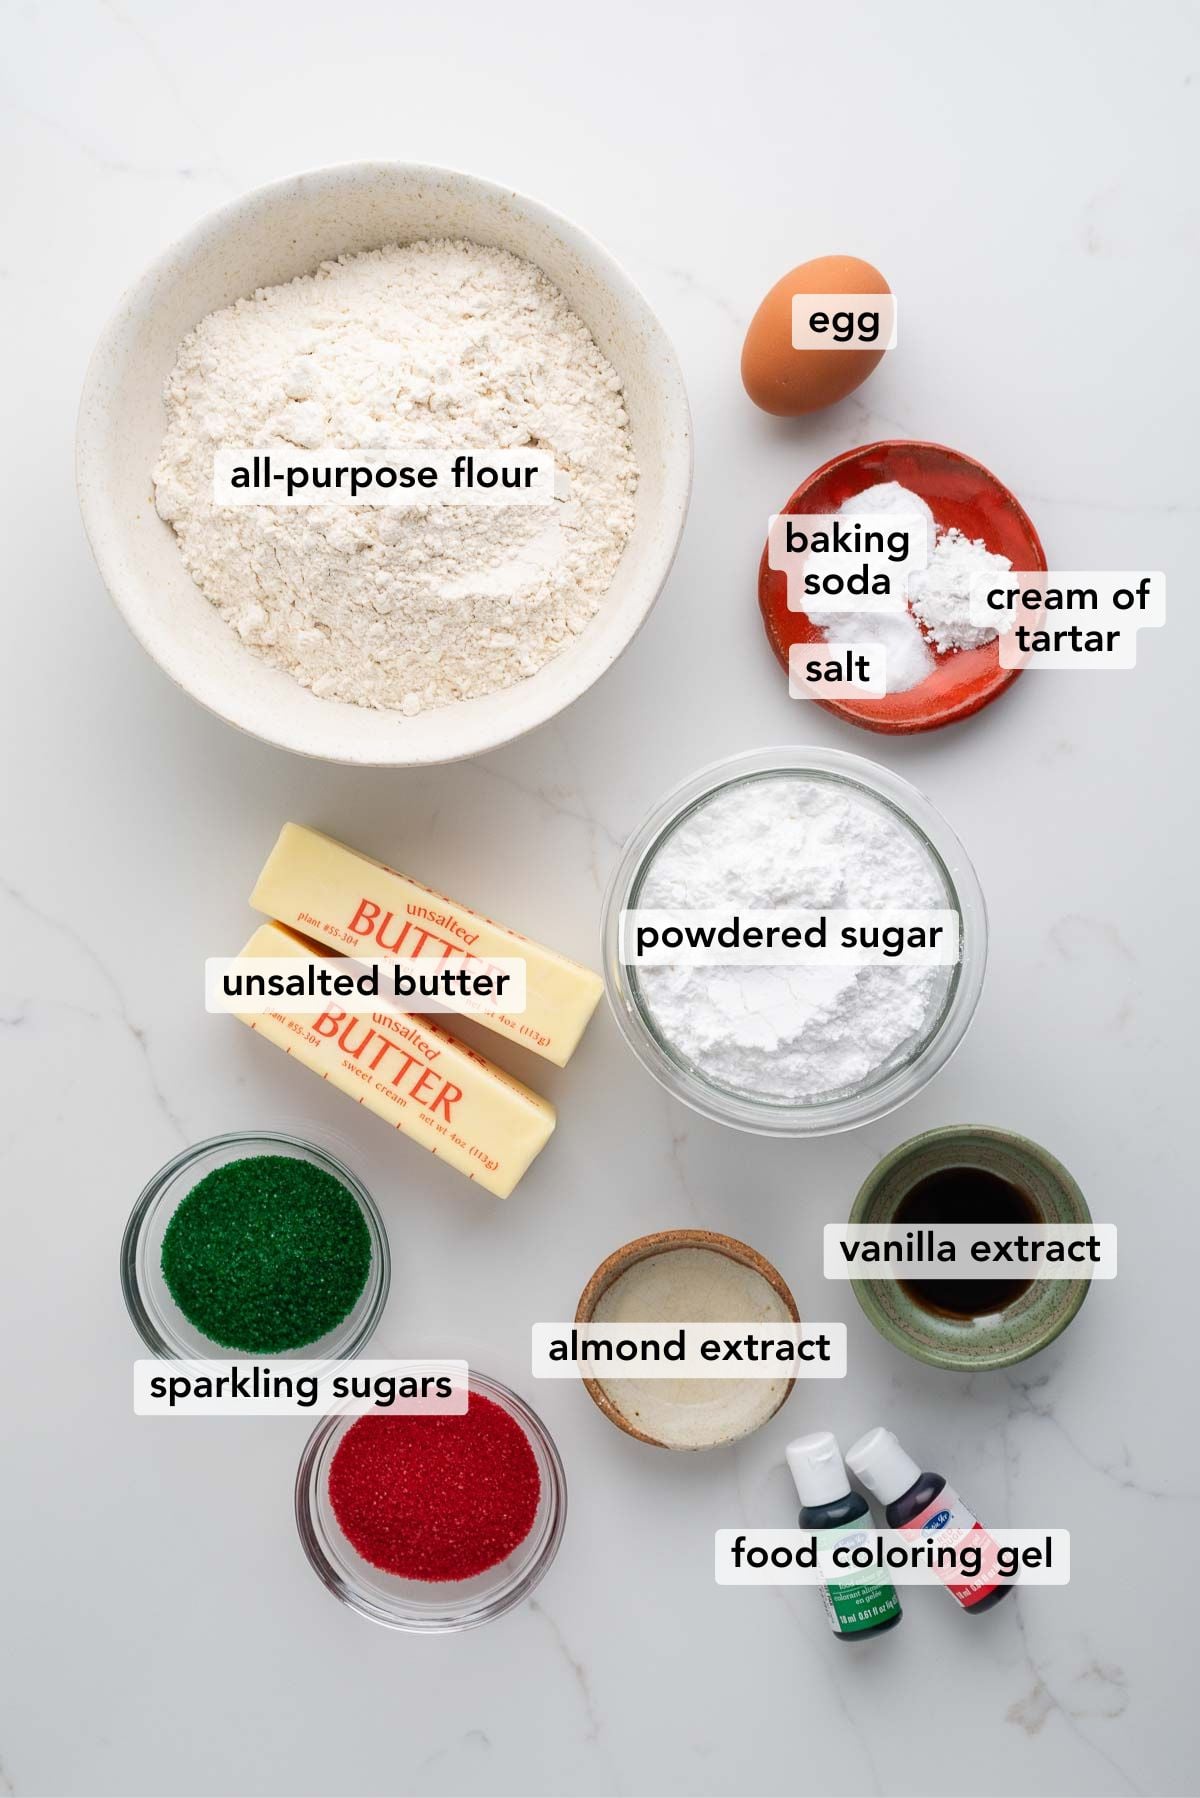
The ingredients in the image below are used for this easy slice and bake holiday cookies recipe. The bulleted items need a bit more explanation, so they're covered below.
- Powdered Sugar. This step is optional, but I suggest sifting it. Powdered sugar is what gives these cookies their soft, tender texture.
- Almond Extract. It isn't required, but it really boosts the flavor of these slice and bake cookies! I strongly suggest including it.
- Sparkling Sugars. I bought my red and green sparkling sugars at my local Giant. They come in wide plastic tubs, which were easier for me to handle than the jars that sprinkles and sugars usually come in.
- Food Coloring Gels. I used Satin Ice brand, which is gluten-free, dairy-free, nut-free, vegetarian, and kosher. Just 4-5 drops in the cookie dough gave a bright color that held after baking. I used green for the trees, brown for the gingerbread men, red (though not a deep red), and white for the candy canes. The white gel needed closer to 8-9 drops to lighten the dough.
Measurements and step-by-step directions are in the recipe card below.
Steps for Making It
Here's a short overview of how to make these slice and bake holiday cookies. The recipe card below has the full printable version, in US customary or metric measurements.
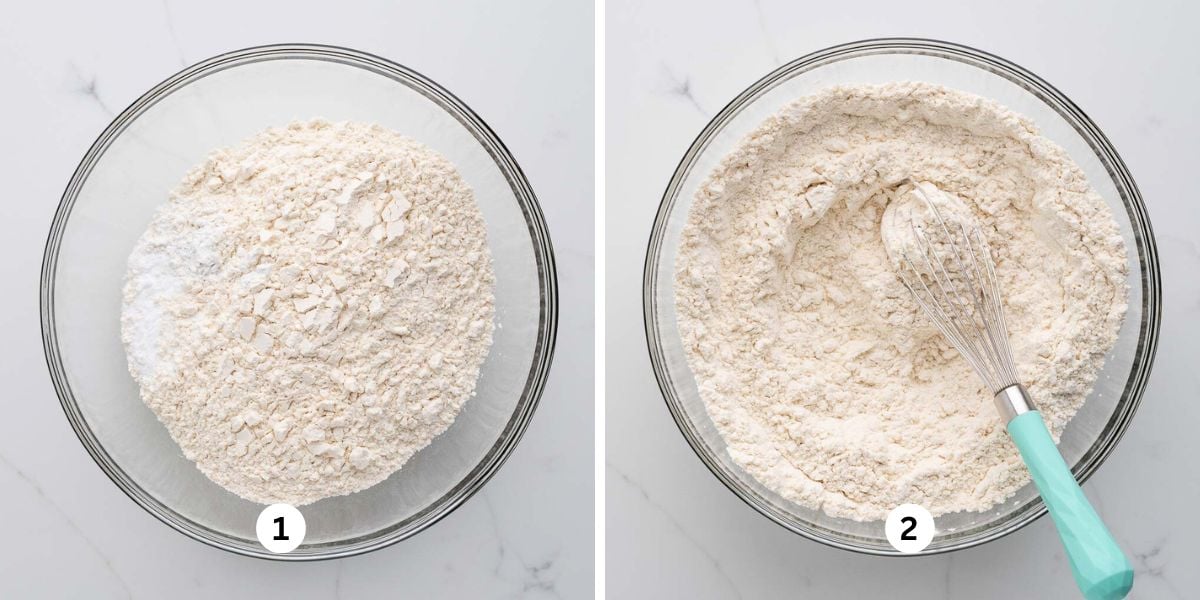
Step 1. Whisk the dry ingredients. In a medium bowl, whisk together the all-purpose flour, baking soda, cream of tartar, and salt (Images 1 and 2). Set aside.
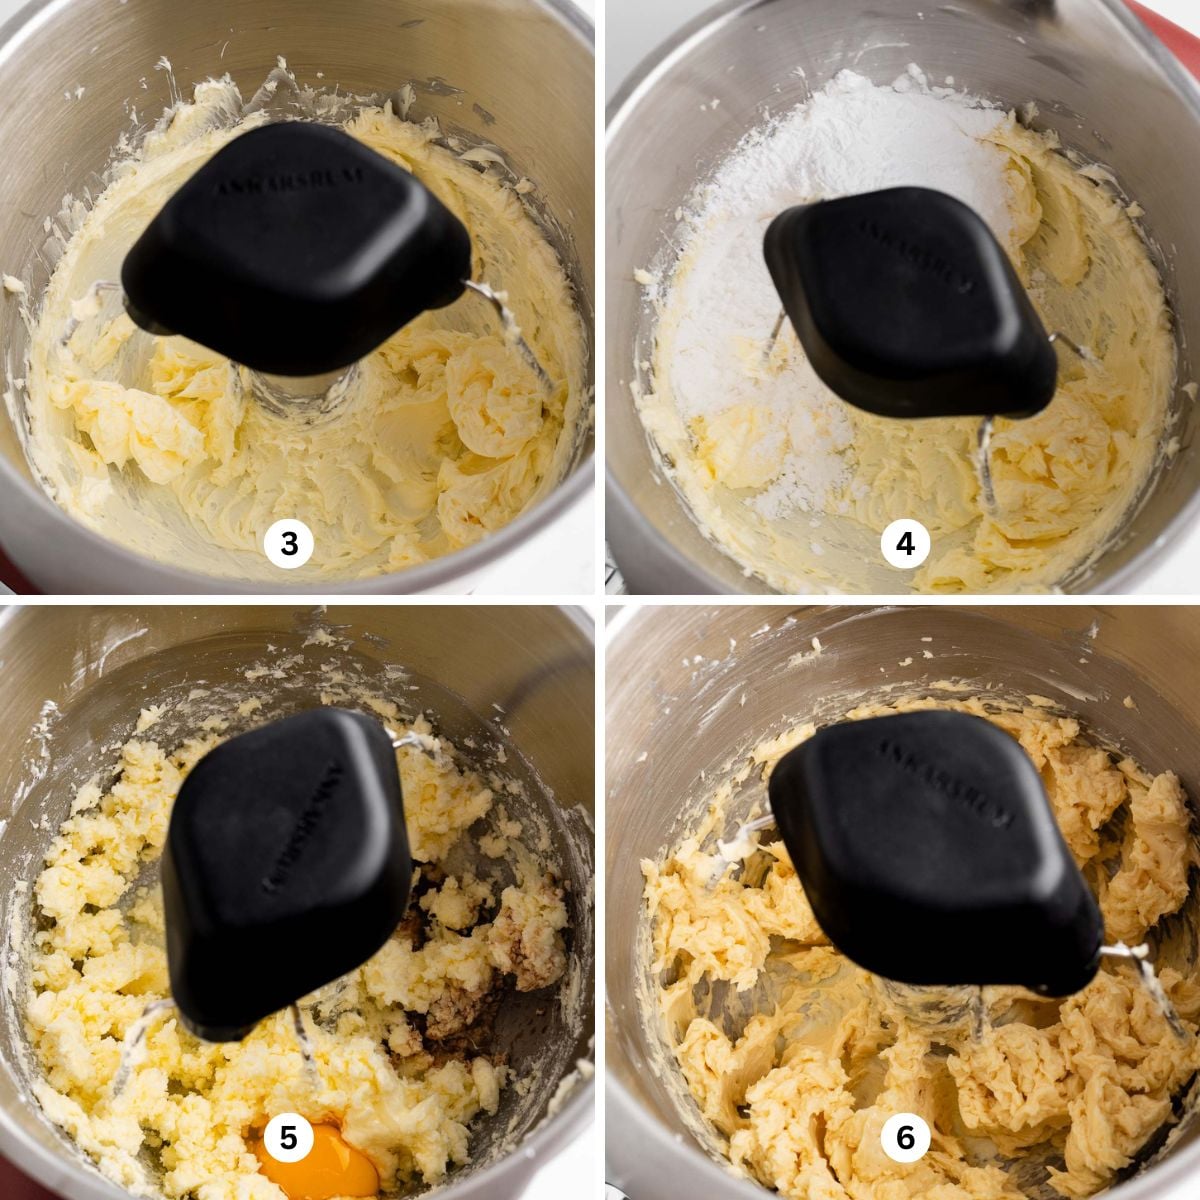
Step 2. Mix the wet ingredients. With your Ankarsrum Assistent Original mixer, beat the unsalted butter on medium to high speed until smooth and creamy (Image 3). Add the powdered sugar (Image 4), then mix in the egg and extracts until fully combined (Images 5 and 6).
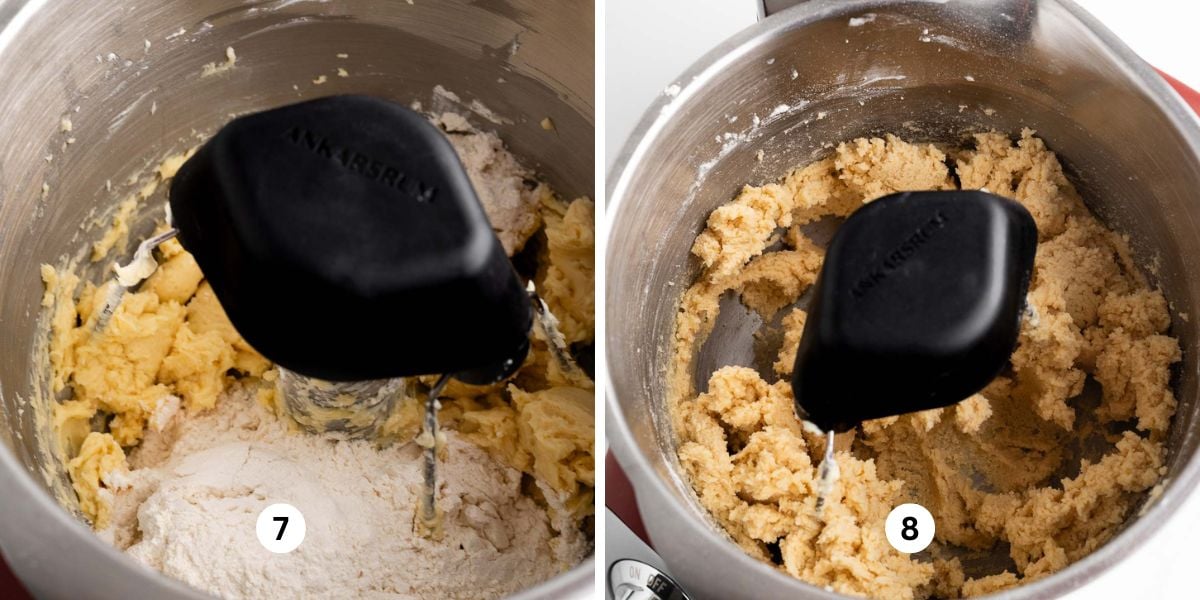
Step 3. Combine the dry and wet mixtures. Slowly add the dry ingredients at low speed, just until blended (Image 7). The dough will start pulling away from the sides of the bowl and forming clumps (Image 8).
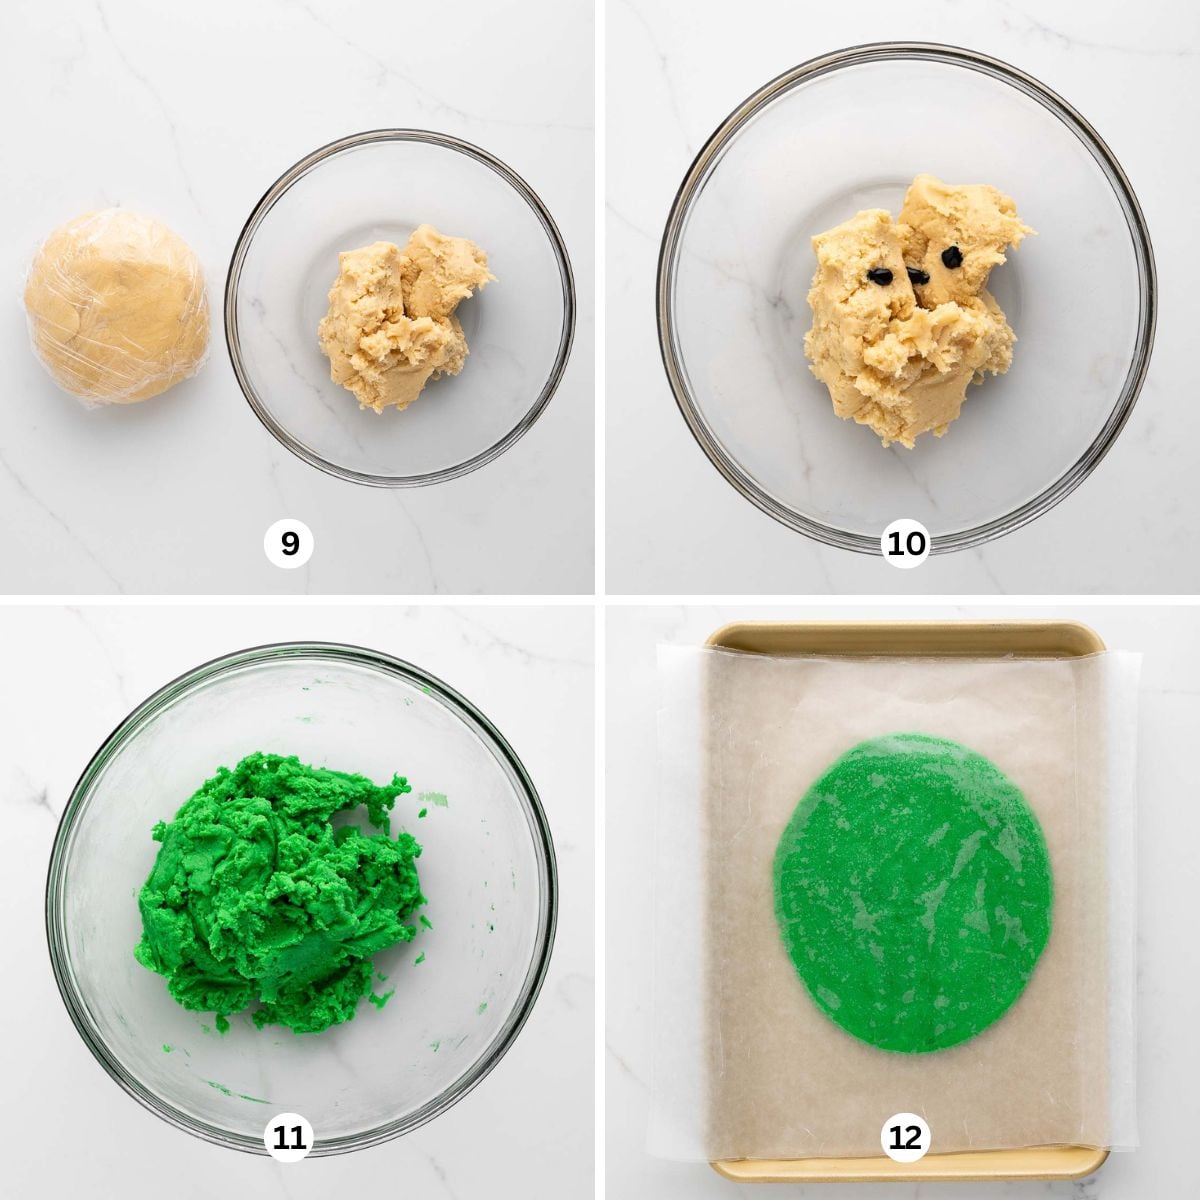
Step 4. Divide the dough. Two-thirds of the dough becomes the log. Wrap it snugly in plastic wrap and refrigerate. Color the remaining third with the food coloring gel (Images 9 and 10). Add 4-5 drops of gel and blend with your hands (wear gloves, please!) (Image 11). Roll the dough to about 1/4 inch thick between two sheets of wax paper (Image 12), then chill for 15-20 minutes in the freezer on a baking sheet.
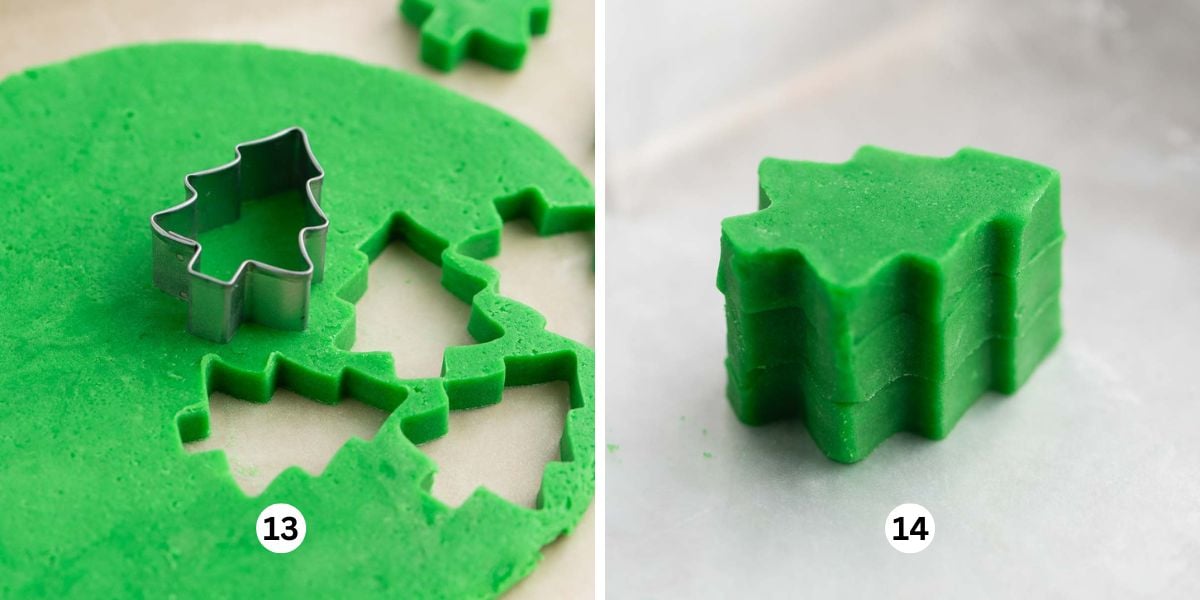
Step 5. Cut out the center shapes and stack. Take the chilled green dough out of the freezer and cut out trees with your mini cookie cutter (Image 13). Stack them on top of one another until you have a column about 7 to 7 1/4 inches long (Image 14). Lay the stack on its side and freeze for at least 30 minutes. Meanwhile, take the wrapped, uncolored dough out of the fridge and let it come to room temperature.
Quick Tip: Keep the colored dough for the center shapes chilled through this whole process. That keeps the trees easier to cut and gives them crisp edges. I also suggest dabbing the top of each tree with a tiny bit of water so they stick together better.
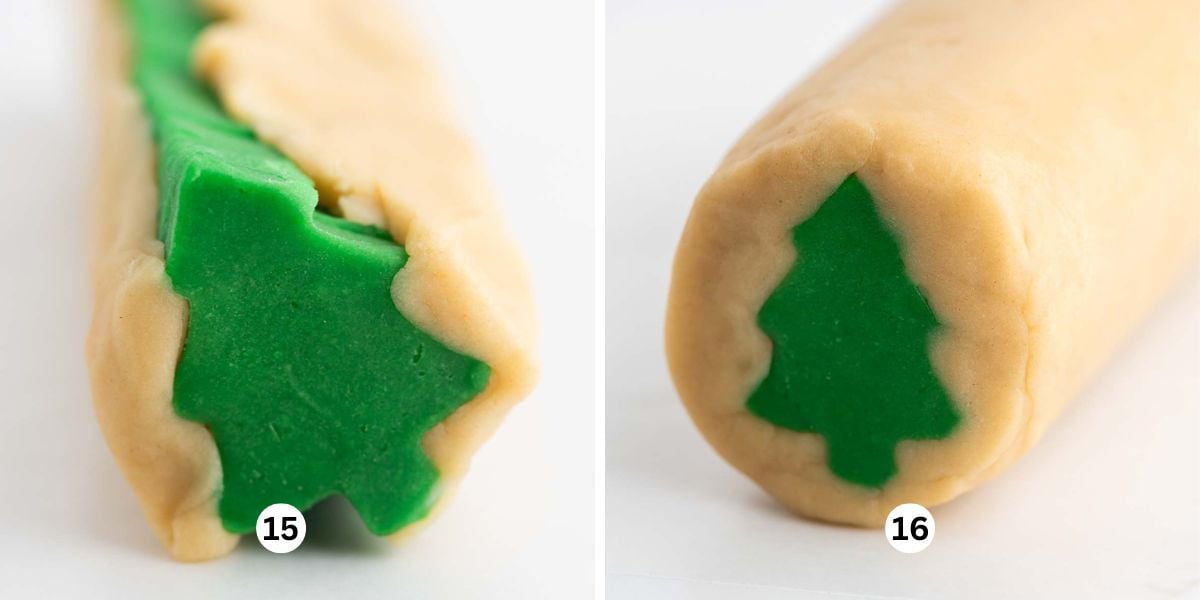
Step 6. Shape the cookie dough log. Use a bench scraper to cut strips of dough and press them into the gaps between the trees (Image 15). The uncolored dough should be soft and easy to shape. Keep building the dough around the trees until a log forms (Image 16). Then double wrap it in plastic wrap and/or wax paper or aluminum foil and freeze for at least 2 hours. I prefer to leave them in the freezer overnight.
Quick Tip: I like to freeze the logs standing upright in an empty cardboard butter box (the kind that holds four sticks), which keeps the dough from freezing flat on one side.
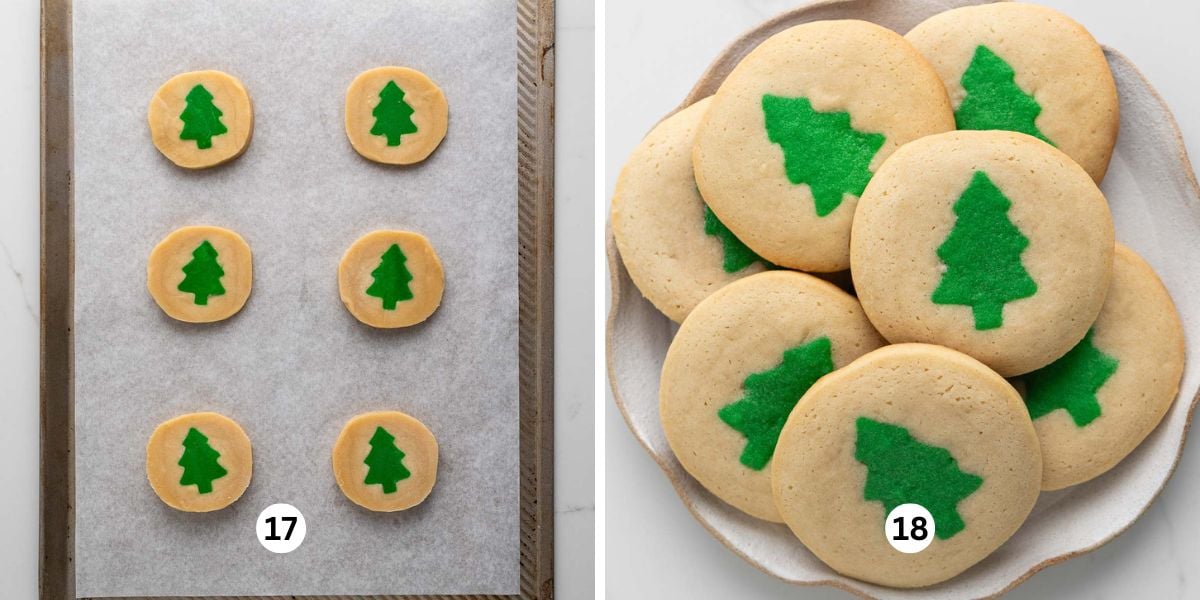
Step 7. Slice and bake your cookies! Take the log out of the freezer about 10-15 minutes before baking. Set an oven rack to the middle position, preheat the oven to 375ºF, and line two cookie sheets with parchment paper or silicone liners. Slice each cookie about 1/4 inch thick and place them on the sheet about 2 inches apart (Image 17). I fit six cookies per sheet. Optionally, roll the log in sparkling sugar before slicing. Bake for 7-8 minutes, then take them out of the oven. Move the cookies to cooling racks to cool completely, then enjoy (Image 18)!
Common Questions
How do I keep my slice and bake cookies from flattening on the bottom when I cut them?As you slice, turn the log 1/4 at a time.
What’s the best way to store slice and bake cookies?Store cooled cookies at room temperature in a tightly sealed container with a slice of bread (this helps keep them soft) for up to 5 days.
How far in advance can you make slice and bake cookies?Pre-made dough logs keep in the freezer for up to three months. Wrap them twice in plastic wrap and/or one layer of wax paper or aluminum foil.

More Holiday Cookie Recipes
Want more recipes like this? Give these a try:
If you made this Holiday Slice and Bake Cookies Recipe or any other recipe on my website, please leave a star rating and share your thoughts in the comments below. Thanks for stopping by!
Festive Slice and Bake Cookies for the Holidays
Holiday slice and bake cookies make a homemade treat that's both fun and tasty. Starting from a pre-made dough, you can slice and bake warm cookies in just minutes, which is great for sharing or gifting during busy seasons.
- Prep
- 45 mins
- Cook
- 8 mins
- Chill Time
- 2 hrs 30 mins
- Total
- 3 hrs 23 mins
- Makes
- 16 cookies
Ingredients
cut out sugar cookies
- 2 ⅔ cups All-Purpose Flour
- 1 tsp Baking Soda
- 1 tsp Cream of Tartar
- 1/4 tsp Salt
- 1 cup Unsalted Butter, room temperature
- 1 cup Sifted Powdered Sugar
- 1 Large Egg, room temperature
- 1 tsp Vanilla Extract
- 1/2 tsp Almond Extract
- Food Coloring Gel, festive colors of your choice
- Sparkling Sugars, optional, for coating outside of cookie log
Method
- In a medium bowl, whisk together the all-purpose flour, baking soda, cream of tartar, and salt. Set aside.
- Using your Ankarsrum Assistent Original Mixer with the cookie whisks, beat the unsalted butter on medium-high speed until smooth and creamy.
- Turn off the mixer and add the powdered sugar. Blend it with the butter on low speed until nearly combined. Scrape down the sides of the bowl as needed.
- Add the egg, vanilla extract, and almond extract, then mix on medium-high speed until thoroughly blended.
- Lower the mixer speed and slowly add the whisked dry mixture until fully incorporated. The dough should start to form a ball and pull away from the sides.
- Set aside 2/3 (or 500 grams, if weighing) of the dough, shape it into a disc or log, wrap it snugly in plastic wrap, and refrigerate. This portion will form the dough around the center shape. Put the remaining 1/3 (or 250 grams) of dough in a separate bowl, add 4-5 drops of food coloring gel, and mix with your hands (wear gloves, please!), a hand mixer, or your Ankarsrum mixer.
- Roll the colored dough to about 1/4-inch thick between two sheets of wax paper, then chill it on a baking sheet in the freezer for 15-20 minutes. If it's still too soft, freeze it for another 10-15 minutes.
- Remove the chilled dough from the freezer and cut out trees with your mini cookie cutter. Stack them on top of one another, dabbing a little room temperature water between each shape, until you have a column about 7 to 7 1/4 inches long. If the dough starts to soften at any point, return it to the freezer with the stacked trees. When finished, lay the stack on its side and freeze for at least 30 minutes. Meanwhile, take the wrapped, uncolored dough out of the fridge and let it come to room temperature.
- Use a bench scraper to cut strips of uncolored dough and gently press them into the gaps of the tree stack. The uncolored dough should be soft and easy to shape. Keep building around the trees until you have a log. Use plastic wrap or wax paper to help roll the dough into a log and smooth its surface. When finished, wrap the log twice in plastic wrap and/or wax paper or aluminum foil and freeze for at least 2 hours. I prefer to leave it in the freezer overnight.
- Take the log out of the freezer about 10-15 minutes before baking. Set your oven rack to the middle position, preheat the oven to 375ºF, and line two cookie sheets with parchment paper or silicone liners. Slice each cookie about 1/4 inch thick and place them 2 inches apart on the sheet. I got six cookies per sheet. Optionally, roll the log in the sparkling sugar before slicing.
- Bake the cookies for 7-8 minutes at 375ºF, until the bottoms and edges are a light golden brown. Let them cool on the sheet for about 5 minutes, then move them to a wire rack with a serving spatula.
- Store the cookies in an airtight container at room temperature with a slice of bread for up to five days.
Baker’s notes
- This recipe made 16 cookies. How many you get depends on the length of the log and how thick or thin you slice each cookie.
- Mini cookie cutters work best for these shapes, since regular-size ones will be too big.
- Wear disposable food-safe gloves when handling the food coloring gel.
- Bake times are estimates and will vary by oven. Always start checking at the first recommended bake time.
- You can also prepare these ahead by freezing the logs for up to one month. Wrap them twice in plastic wrap and/or one layer of wax paper, then place them in a sealed plastic bag or container. Let the log thaw on the counter for about 15 minutes before slicing and baking.
- For the candy canes, I split the leftover 1/3 of dough in half. I colored one half red with food coloring gel and the other white. I rolled each out between wax paper, chilled them in the freezer, and cut them into strips. Then I arranged the strips in alternating colors, gently rolled the dough to flatten it a little, chilled it again, and cut out the candy cane shapes.
- Roll the cookie dough logs in sparkling sugar before slicing. Don't coat them in sugar before freezing.
- This recipe is adapted from my Super Soft Cut Out Sugar Cookie recipe, a family recipe passed down to me by my late Grammy.